One thing to keep in mind when we start to work with the Anypoint Platform is how we can keep our applications under the best structure and best practice allowing eventually to make any change / upgrade / migration easier. By default Mulesoft has in Exchange a list of connectors and templates that customer can reuse and once you download one of them you have all the structure you need to continue re-using that specific integration. But, maybe we are starting a project from scratch and we need to keep in our minds some best practices to implement along the one Mulesoft provides.
Some point I personally consider important when I start an application are:
- Using maven to build and deploy your application
- Set properties files in you project pointing to your dev and production environments (dev, test, stage and production for example.)
- Use Secure Place Holders if you have sensitive information like passwords, credit cards or any token that needs to be hidden.
- Keep your code in source control like Bitbucket, GitHub or GitLab
- Use branches in source control, if eventually you start using a pipeline it would be easier to operate and deploy your applications.
- Use pipelines in your project (CI / CD integration), to have an automated way to deploy and release your applications will make your life easier, keep control of changes and rollback in case of needed.
For now and for this post, let’s create a simple application using maven and that contains different properties files connected to different environments:
- Open AnyPoint Studio, in my case I have 6.4.4 version
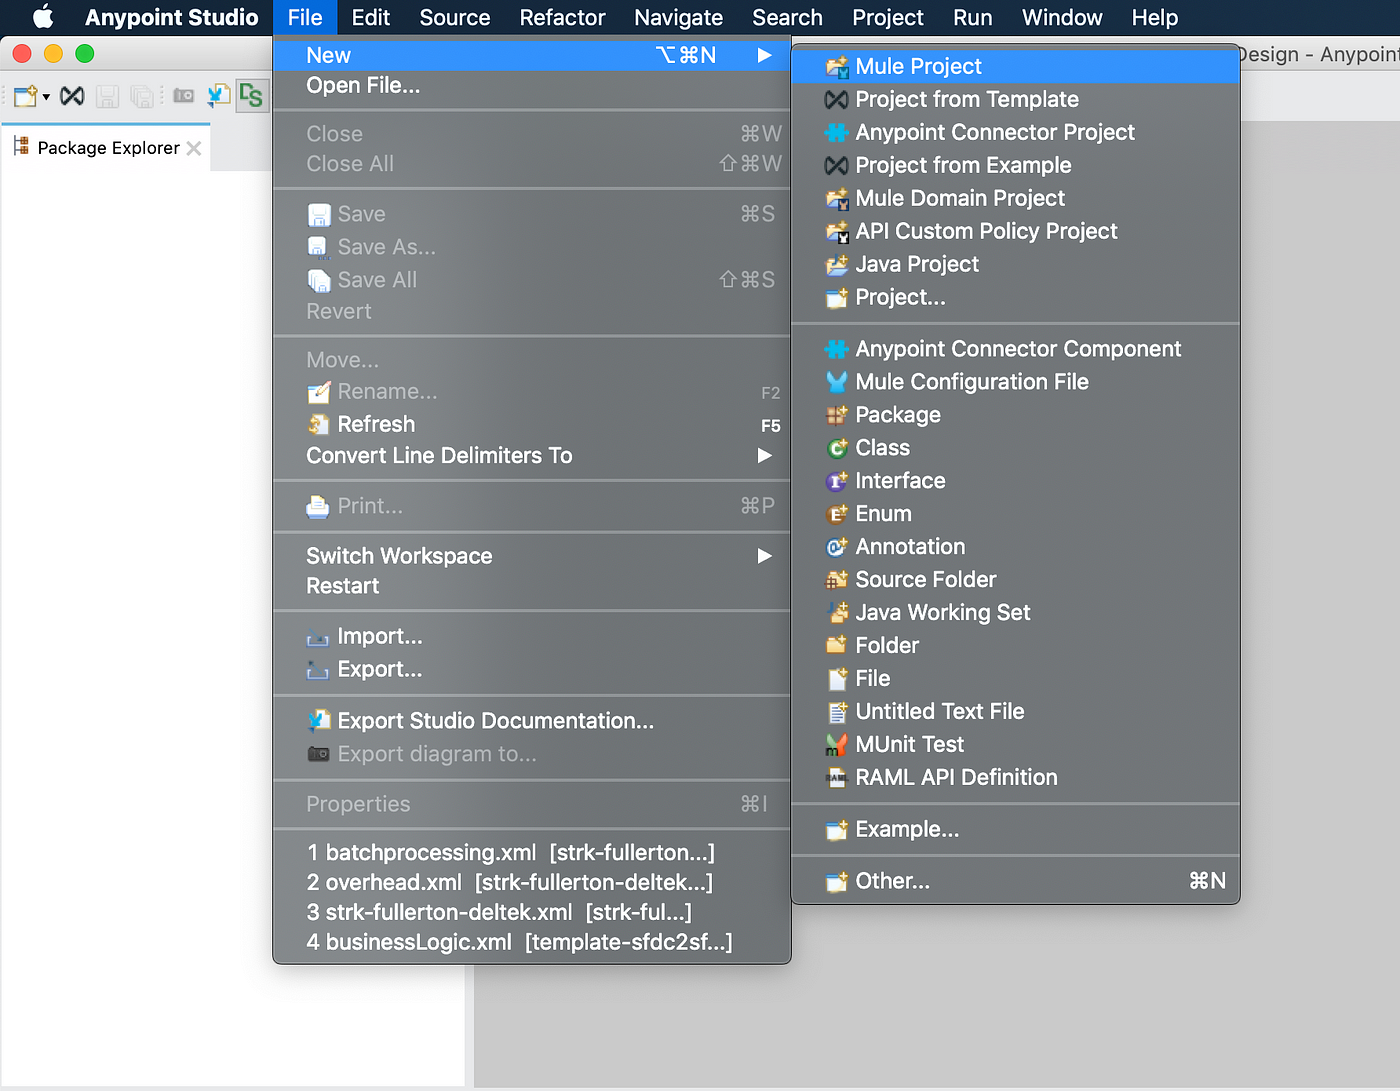
2. On the next screen, we need to give a name to our application and check the Use Maven.

3. Clic Finish
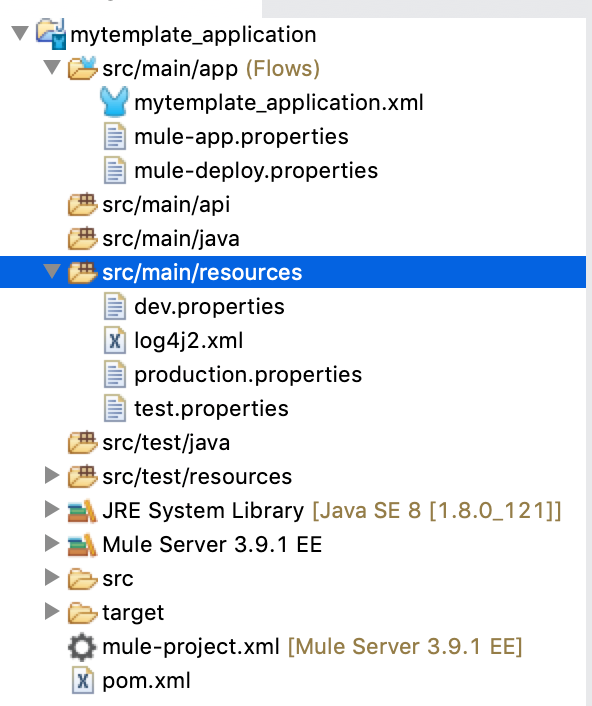
4. Under src/main/resources let’s create 3 files (dev.properties, test.properties and production.properties). Our project should look like:
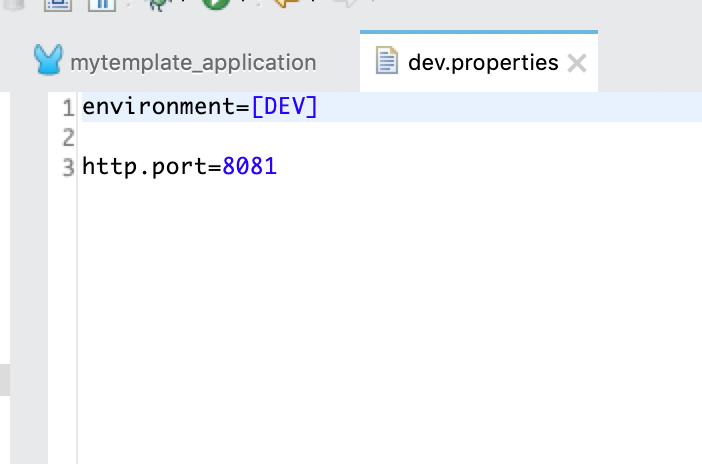
5. Lets set a property in every properties file named environment and http.port
6. In our canvas, let’s drag a flow and an http connector exposing a basic endpoint just to demonstrate this scenario (best practice would be to have our RAML file defined and the API Kit in place in our project).
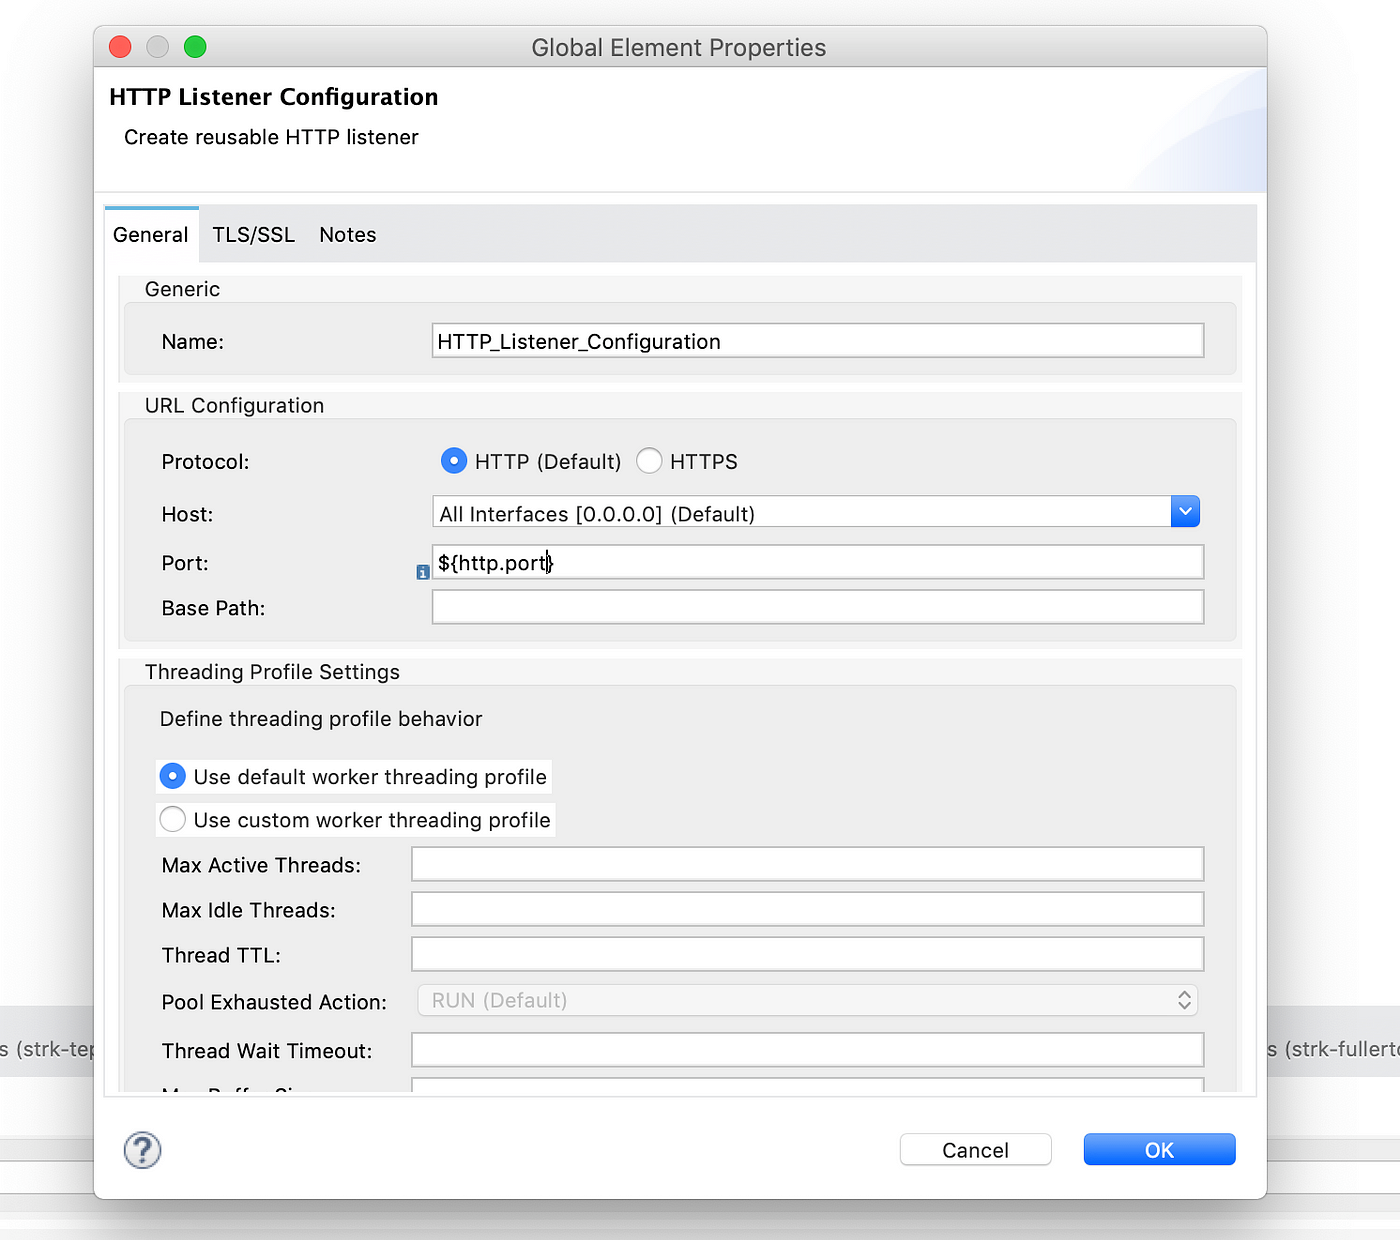
7. Let’s create a configuration to our http connector that looks like this: Port is binding with this properties value: ${http.port}, clic “Save”
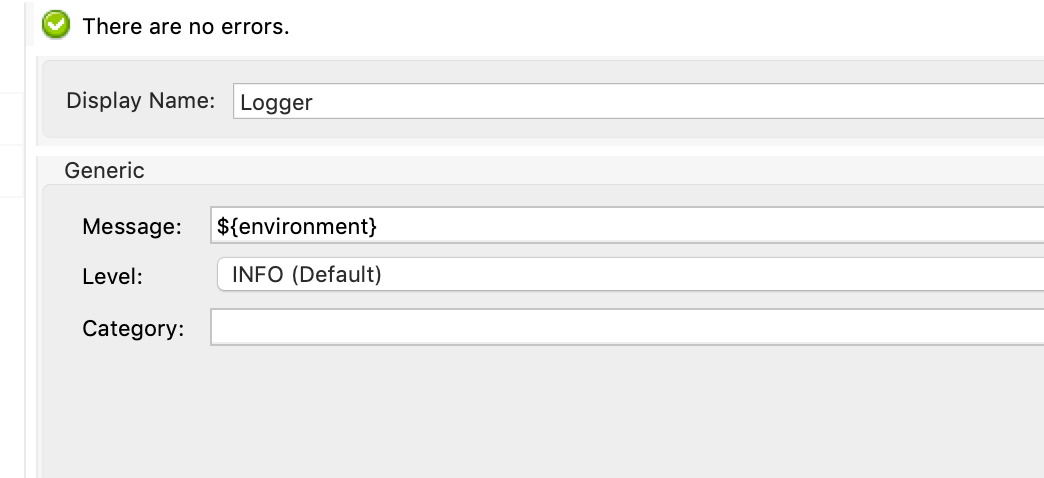
8. Drag a logger connector and let’s print the environment property using ${environment} value.
9. Now we should use Content Place Holder to define how to grab the properties files. So now we clic on the Global Elements tab and clic on Create, we can search for Property Place Holder
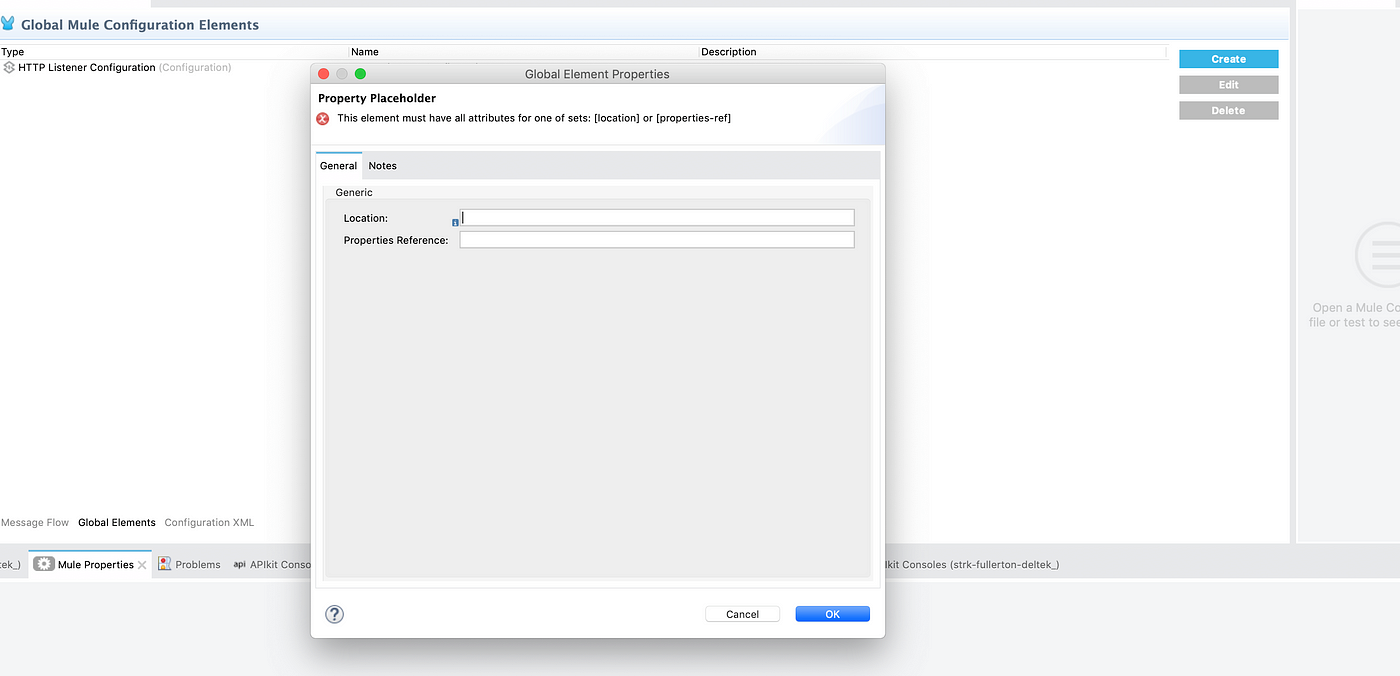
10. Location value should be ${env}.properties (the env variable gets binding from maven if we deploy from command line aligned to the POM.xml or setting the variable when we deploy our application to CloudHub)
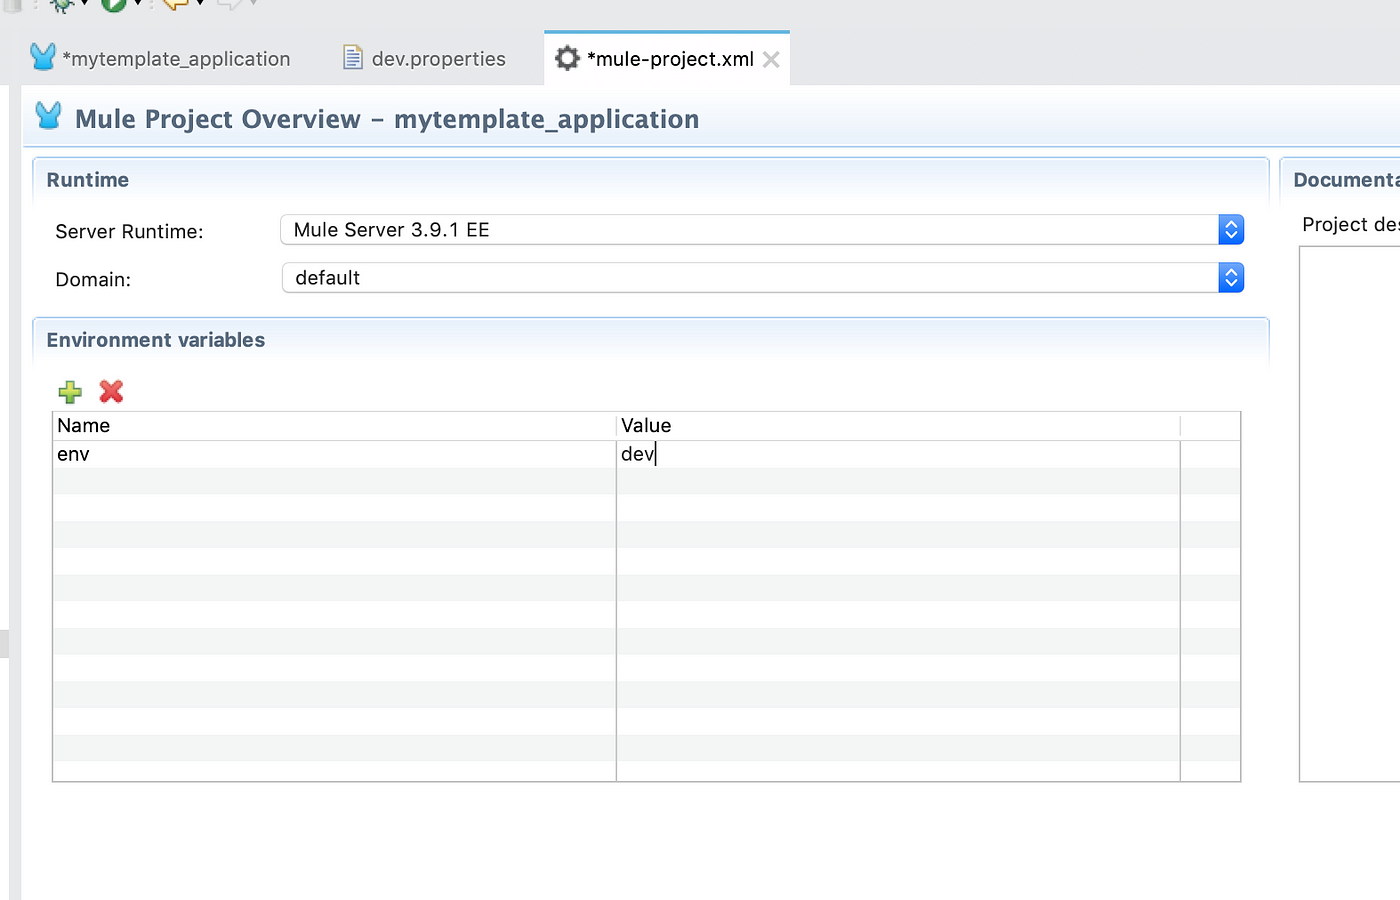
11. Open your mule-project.xml and we set the env environment variable to dev, so then mule knows what properties file is going to pick.
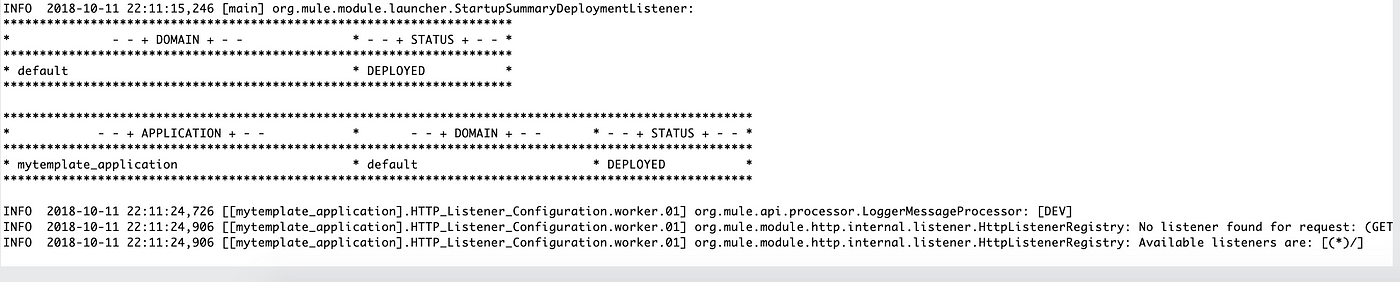
12. To verify our application is working, we can run our mule application, once is deployed we can go to http://localhost:8081 and we should see the value in our logger:
12. Then we can upload our app in CloudHub, right clic in our project, Anypoint Platform > Deploy to Cloud

13. We select the environment, and we set the properties value, for Sandbox we should use env=test
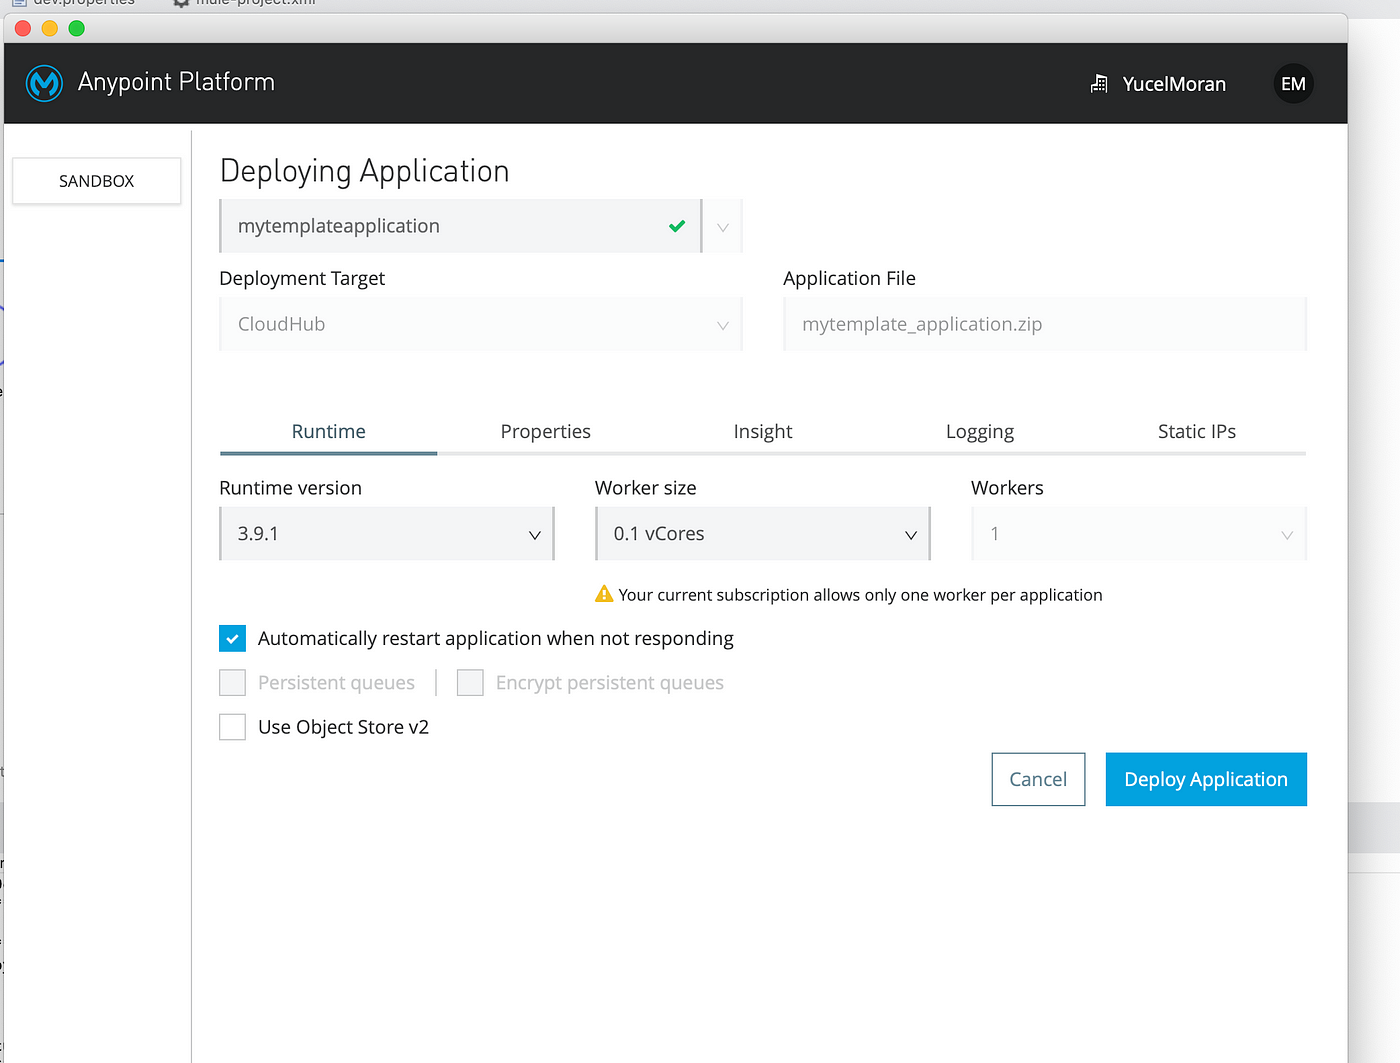
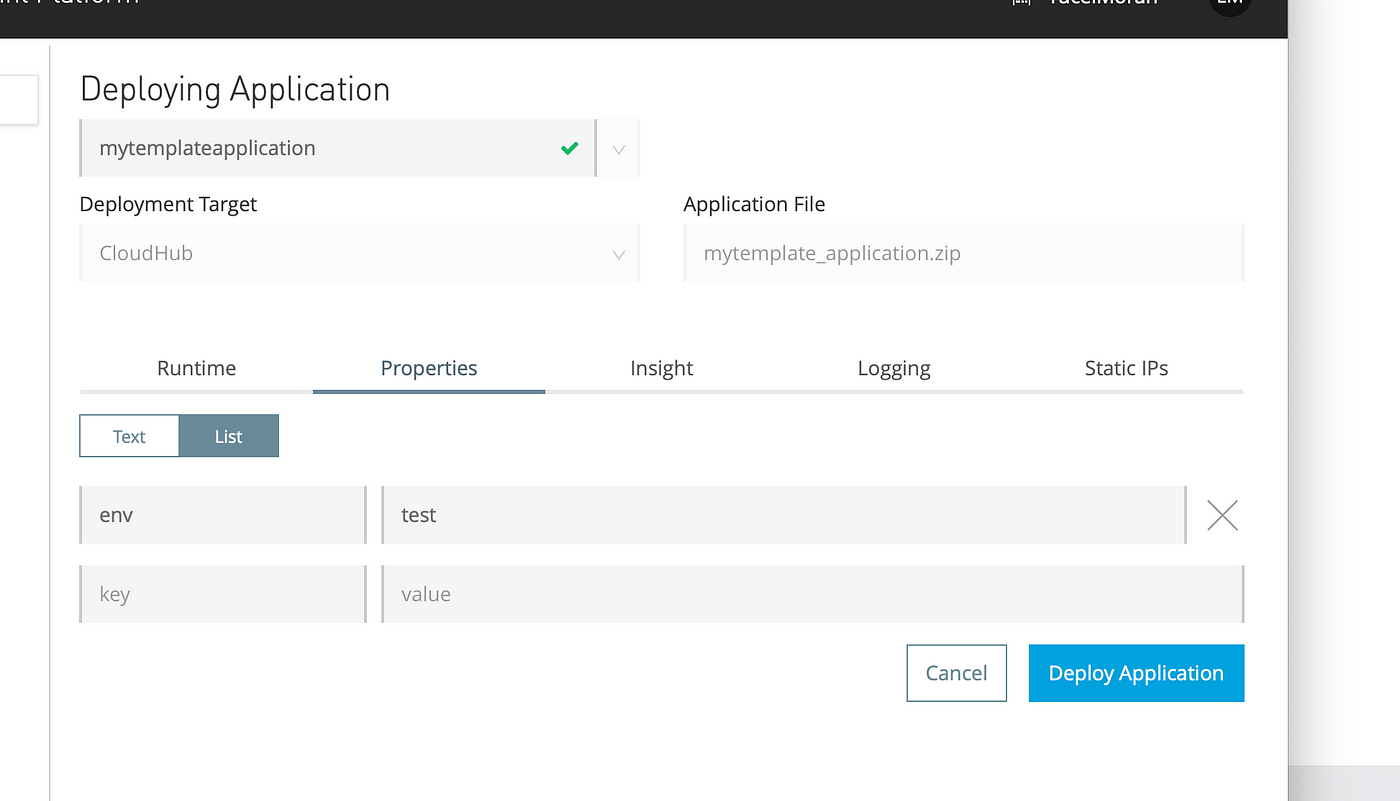
14. Clic on Deploy, our application gets deploy in Cloudhub and we can use the auto-assigned domain: mytemplateapplication.us-e2.cloudhub.io
15. We can check the logs and we see it picked the test.properties file:
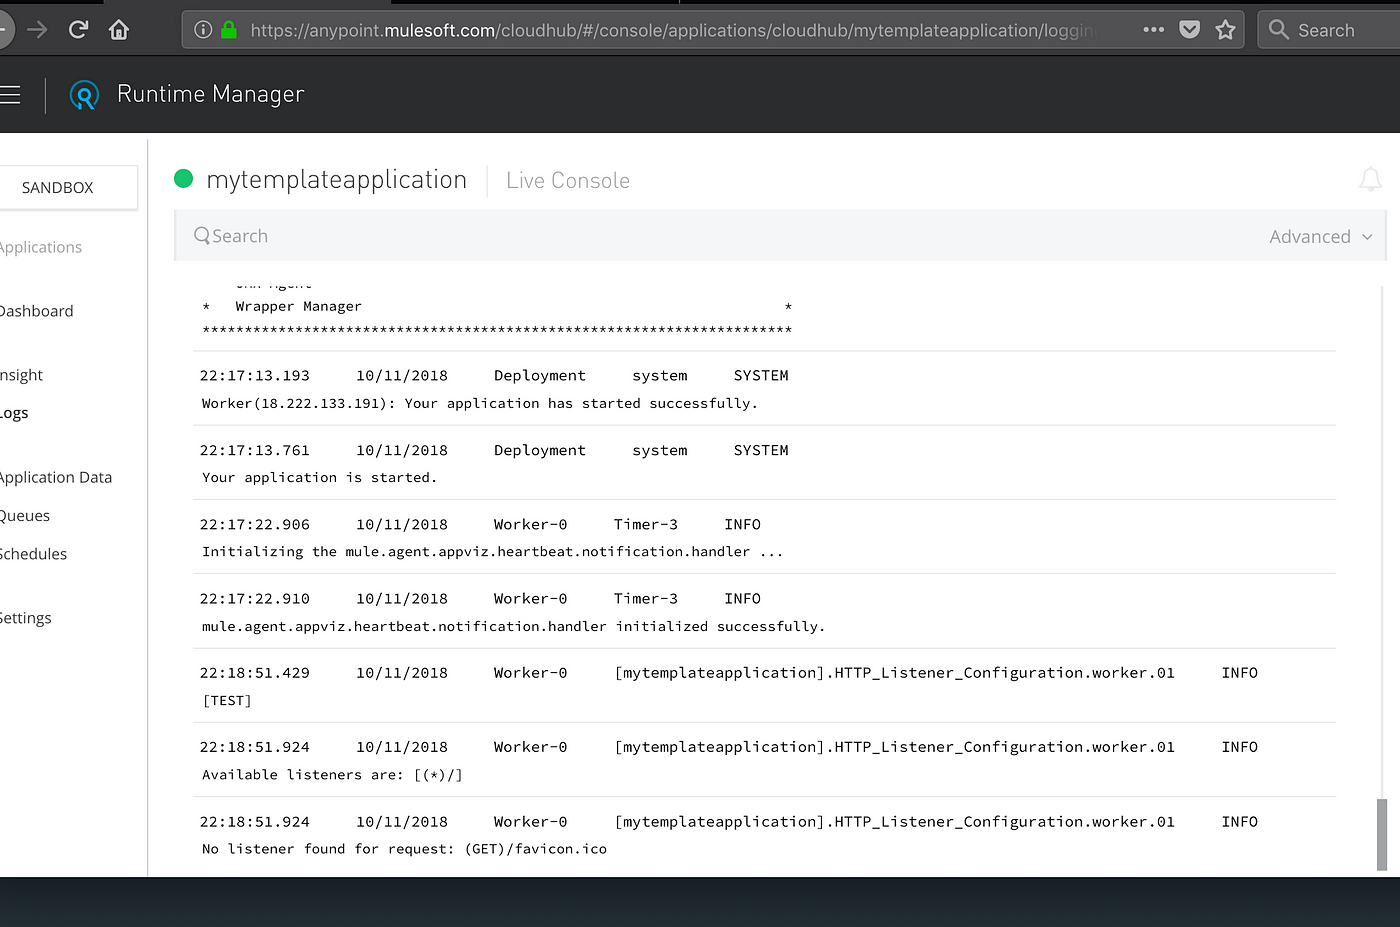
So now we are able to keep separated properties values and have all of them linked to the right environment.
You can download the project from this GitHub repository
ENJOY